Beautiful manicure with sand: how to do it yourself?
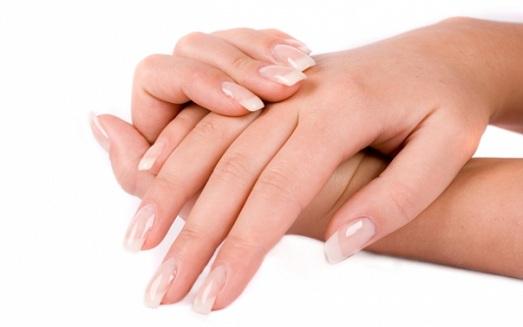
Luxurious manicure is a very important part of the image. And if it is beautiful and stylish, it will definitely attract attention and become the finishing touch of your bow. In recent seasons, sand manicure has been actively used, which can be done at home. All the details are in the article.
What is a sand manicure
A sand manicure or sand manicure is a special type of coating that looks like a surface on which sand has been poured. The nail plates can look like satin, plush, velvet, matte or sugar (like marmalade).
Good to know! Sand manicure remains in trend for several seasons in a row, and it is chosen by both young girls and mature ladies.
Advantages and disadvantages
Sand manicure has its pros and cons. Let’s start with the positives:
- Versatility. The sand cover is suitable for absolutely everyone, regardless of age, clothing preferences, dress code and style. In addition, sand can be combined with any shape and length of nail plates.
- Showiness. Nails, which seem to have been covered with sand or powder, look original and luxurious, giving charm and exclusivity to the manicure.
- Elimination of defects. The sandy coating literally adjusts to the relief of the nails, hiding irregularities and other imperfections.
- Relative ease of execution. Sand manicure, if you have the necessary materials, tools and minimal knowledge, it is quite possible to do it yourself at home. It is not difficult.
- Powder or sand is sold today in many nail service stores.
Now the downsides:
- Rough surfaces can cling to clothing and objects, causing discomfort.
- Possible difficulties in removing the coating. Small particles can cling to cotton pads and make it difficult to remove base coats.
- Homemade sand manicure can be short-lived, lasting only a few days. And a sand manicure performed in beauty salons is not cheap.
Materials used
To imitate a sandy surface, special materials are used: fine acrylic powder, the so-called “velvet sand” (coarse-grained powder), flock or ready-made velvet (sand) varnish containing particles similar to grains of sand.
Acrylic powder is fine-grained and creates matte surfaces. Velvet sand is coarser, therefore imitating coatings similar to scattered sand or sugar. Flock creates the effect of fleecy fabrics or numerous fibers, which can resemble satin, plush or velvet fabric or light dusting.
Important information! Sand or powder can have different colors. Standard and universal – translucent white, which takes on the shade of the background varnish after application and integration into the coating. That is, there are also multi-colored powders of a wide variety of tones: light pastel, deep and rich, juicy and bright, neon. And also the composition may include glitter, the smallest shimmering particles.
Also for sand manicure, standard materials and accessories are used: base, background gel polish, topcoat or top. For primary manicure, a standard set is used: buffs and files, clippers (nippers for cutting off excess skin around the plates), scissors. For an even distribution of sand, it is advisable to use a wide fan brush.
Features and stages of technology
How to make a beautiful and trendy sand manicure? The technology includes the following stages:
- Basic manicure. The cuticle is processed with orange sticks, the excess skin around the nail plates is removed with a clipper. Excess length is removed with scissors. The files are used to give the desired shape.
- Further, with the help of a buff, the surfaces of the plates are processed to eliminate irregularities and prepare the nails for the best adhesion to the coating.
- Now the surface of the marigolds needs to be cleaned of dust and other contaminants using a special degreaser.
- Then a base coat is applied to the prepared feet, which is dried under a UV lamp.
- Next, you need to apply the main background gel polish in two layers.
- The next step has two options. The first is the application of acrylic powder or velvet sand to the second undried layer of the background gel polish. The second option is to dry the second layer and apply a top (base), on which a sandy coating is formed: it is distributed over the sticky layer until it dries.
- Powder, sand or flock is poured onto the nail as evenly as possible directly from the container above the sheet of paper or with your fingers above the jar. Distribution and removal of excess is carried out with a fan brush. For a denser coating, several sand layers should be applied: each previous layer should be well distributed and embedded in the base (gel polish or finish) before forming the next one. You should also wait at least a minute for the material to “settle” on the nail plates.
- Further, the coating with powder or sand is dried under a lamp.
- If the sand was applied to gel polish, then the final stage will be the use of a top-end finishing agent. If the powder was distributed over the finish, then you can not process the plates with a top (although this fixing will extend the life of the manicure).
Advice! If you use a ready-made sand or velvet varnish, then the process is simplified. Such a product is applied to the base, dried and fixed with a finish.
Sand design options
Consider some interesting sand manicure design ideas:
- Full coverage. All nails are completely covered with velvet sand or acrylic powder. The plates can be of different colors.
- Emphasis on one or two nails. The sandy coating is created in the form of accents on one nail or on two (on each hand).
- Gradient or ombre. The first option is to sprinkle the finished gradient created with gel polishes with powder. But you can also make a transition from velvet sand by sprinkling powder of two colors on the nail and gently mixing it with a brush at the border for a smooth transition.
- Patterns: flowers, curls. They can be created either with a thin brush with flexible dense fibers, or with special stamping stamps. In the first case, paint patterns on the background, dust and dry. In the second case, apply gel polish to the stamps, make prints on the nails, sprinkle them with velvet sand and dry them.
- Bulky knit imitation. A pattern resembling knitted patterns is applied with a transparent or colored varnish, sprinkled with powder or sand, and then dried in a UV lamp.
- French. Sandy can be either only the edge, or, conversely, the main part of the nail plate.
- Artistic painting. If you have artistic skills and know how to draw well, then create masterpieces on your nails. Drawings are applied with colored varnishes, after which they are sprinkled with powder to add volume. But you can also draw pictures with transparent gel polish and paint them with sand or powder of one or different shades.
Sand manicure is the trend of the season. And you can completely cope with such a design on your own if you arm yourself with the information from the article.


